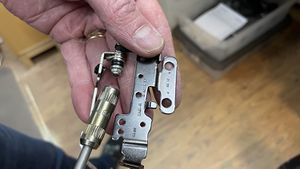
Fixing Laptop Hinges
When a laptop screen comes off in your hand (or feels like it might), this page will help...
Summary
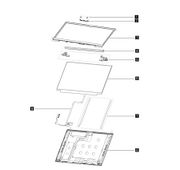
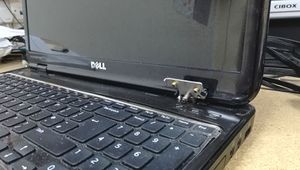
Part of the evolution of laptop computers has been the development of thinner display modules. This module is a sandwich usually containing a screen, webcam, and wireless antennae encased between a front bezel (the bit you look at) and a lid. Somewhere within this sandwich are the hinges which anchor the display module to the laptop’s body, whilst allowing it to open and close. The thin design of the display module means that the mounting points for the hinges (embedded into the lid) break with far more frequency than machines designed a decade ago.
Although we often relate these breakages as a broken hinge, the reality is that the hinge is often undamaged, and the fault is with the attachment of the hinge to the base or the lid
Safety
- Some display modules contain magnets which trigger hall effect sensors in the laptop body which power-on the machine when the lid is opened. When handling a loose display module, be aware that this mechanism makes it very easy to accidentally switch on a laptop.
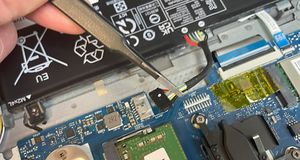
- There will be (at least) one cable running from the laptop’s body, through the hinge and into the display module, so work out the placements to avoid damage.
Tools
Basic repairs will not require any specialist tools, just a few things which you may have around the house.
- Small Philips Screwdriver
- A pair of tweezers
- A hairdryer
- Adjustable wrench
- Spudger – or guitar pick or old debit card
- 6” ruler from a children’s school stationery set
- A Pencil
- A tea-towel, cloth or duster.
For more complex repairs, there are one or two non-standard items which are useful. We’ve provided links to help sourcing.
There is a chance that you will need spare parts, but we’ll get to that later.
Assessing the problem
Carefully examine the display module, looking closely at where the hinge has become detached. It should be obvious what has failed and where.
Removing the Screen Bezel
It’s a good idea to remove the bezel from the display module to expose both hinges for assessment. A fracture on one hinge side will strain the other and it’s usual for the left and right sides to require attention.
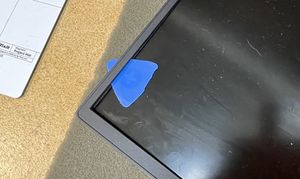
Bezels are often fixed into place with adhesive tape, so aside from some gentle prying with a spudger, a gentle application of heat with a hairdryer will loosen the bond to aid the removal.
If the laptop has a full-glass touchscreen, removal may be trickier. See below for Disassembly pointers.
Disassembly
In the case of an older laptop with a user-removeable battery, remove it before doing anything else.
More modern thin laptops tend to have a built-in battery. To prevent accidental power-ups, disconnect it from the motherboard.
To reduce the risk of damage during the repair, it’s good practice to remove the display module from the machine. On modern laptops, this is simply a matter of removing the screws which hold the bottom cover/baseplate/D Cover in place.
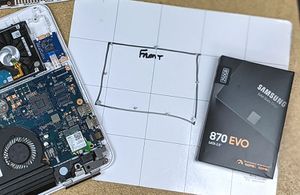
Top Tip: Note the location of screws as you remove them. A bargain-bin magnetic mat and dry-wipe marker are ideal, but taking plenty of photos and making comprehensive notes will suffice. Why do you need to do this? Depending on the severity of the break, it coould be many weeks before spare parts arrive, and although by tomorrow you may recall exactly which hole that slightly-longer-than-all-the-other screw goes into, in three months time it might be a different matter.
An alternative is to stick the screws to blobs of blu-tac on an A4 sheet of paper. Against each blob, write where the screws came from, or if following an iFixit guide, the step number. If you only use half the sheet, you can fold it over to keep the screws safe for reassembly at a later date.
Remove the hinge screws holding the display module to the laptop body and, using a spudger, open the hinges slightly. This will make it easier to separate the two halves of the laptop.
Finally, disconnect the cables running from the laptop body to the display module. Depending on your laptop’s specification, there may be more than one.
It should now be possible to separate the laptop body and display module.
Disassembly Help
Some manufacturers provide detailed disassembly guides for their machines. For example, here is the guide for the Lenovo IdeaPad P580
To find the disassembly guides, go to the support page of the specific laptop and look in the Manuals section. Depending on the manufacturer, they’re usually listed as hardware maintenance or service guides.
Screen Removal
During the repair process, it may be necessary to remove the display panel. This will depend if the laptop’s screen overlays the hinges.
Modern laptop screens are fixed into place with adhesive strips, so look carefully for the pull-tab and use tweezers to slowly (and I mean slowly) remove the glue.
Top Tip: Applying some heat to the laptop lid (not the screen) will help soften the adhesive strips, especially on cold days or low temperature working environments.
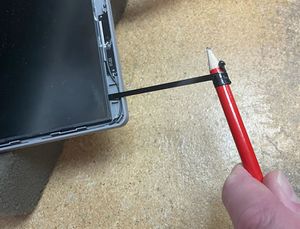
Bonus Top Tip: To smoothly remove the adhesive strip, use tweezers to pull a few centimetres away from the screen, then wrap around the body of a pencil. Gently roll the pencil, stopping every few moments so as not to put too much force on the strip. Broken Adhesive Strip: If the adhesive strip snaps, it’ll probably ping back behind the screen, making it very hard to extract. Time for a plan:
- Remove the adhesive strip on the opposite side. If that breaks too, don’t panic.
- Heat the laptop lid (again, not the screen). Focus the heat over the area where the strips run to soften the adhesive.
- Using a 6” ruler (or other flat, straight edge) push it under the screen, starting with from the point where you deem there to be less/no adhesive tape. Slowly push whilst gently tilting the screen. You should feel the adhesive tape loosening as the screen is pried loose.
- If you break the screen during this process, then curse your rotten luck and blame the manufacturer for using cheap adhesive tape. Breakages during extraction are a risk of repair.
Once the screen is loose, carefully disconnect the 40/30/20 Pin connector:
- Some connectors are covered in a clear tape. Look for telltale edges.
- Other have a thing retaining bar to lock it in position. This can easily be flipped back (to unlock) with tweezers or spudger.
Fixing the problem
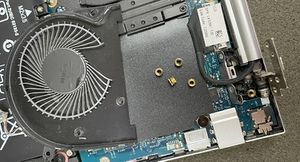
Once the screen and hinges have been removed, the damage will be obvious. To secure the hinge into the laptop’s lid, a threaded brass (usually) bush is set into plastic mounts. Over time, these plastic mounts become fragile and shatter, so the hinge is no longer secured. The amount of damage will determine your approach to the repair.
If the bushes are loose with only a minimal amount of the plastic mount missing, a repair with a glue or epoxy could be possible.
However, if the damage is substantial, then the repair will require replacement parts.
Glue Repair
Being able to glue the brass brushes into place is the simplest form of hinge repair, but take care with the type of adhesive that you use. Simple glues will not cope with the torsion forces when a laptop lid is opened.
A recommendation is J-B Weld’s PlasticWeld, which is a two-part adhesive and epoxy filler. It is formulated for plastic repairs and sets in around 5 minutes and cures within an hour or two. Our preferred technique is to apply a layer, then let it cure for a few hours, then apply another layer and repeat as required.
Top Tip: To maximise the chances of a glue repair, it is worth slackening the tension on the hinges (see Hinge Maintenance). Although this makes the lid action looser, it reduces the torsion forces through the hinge, giving the glue a better chance of long-term survival.
Full lid replacement.
Replacing the lid on a laptop is made more complicated by the bespoke nature of laptop design. The replacement part (ideally) needs to be identical to the one being replaced, otherwise screw-holes and plastic catches won’t match.
To demonstrate the safest way to proceed, we’ll walk you through a real-life case study of replacing the lid of a Lenovo IdeaPad 1-15ADA7, using the steps above and some extras. Not all laptops will look exactly like this one, but your process and workflow will be similar. For this repair, we need replacement parts.
Sourcing Replacement Parts
Look inside the lid which has broken. There is often a sticker or mark which gives a part number. This number is vital to establishing compatibility.
Many of the major laptop manufacturers have resources where the part numbers can be found. HP keeps this information within their servicing documentation, which is often available from the support page of the laptop model. Tap the laptop’s serial number into Lenovo’s website, it will display a list of parts with part numbers. If you’re lucky, Lenovo will also sell the parts too. If the part number isn’t yielding results, then an internet search using the exact model number of the laptop (e.g. Lenovo IdeaPad 1-15ADA7, rather than Lenovo IdeaPad 1) and the term “top lid” will usually bring something up. There are many vendors selling via their own stores or eBay who distribute quality new and used parts.
Case Study
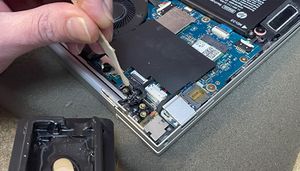
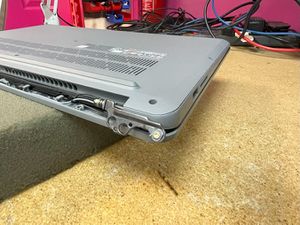
This Lenovo IdeaPad has a ‘broken’ right hand hinge. The hinge mounts have broken, resulting in the display unit becoming loose. Once the bottom cover/d-cover has beem removed (see above) then disconnect the battery cable to prevent accidental startups. Then, using the information above, remove the screws holding the hinges to the motherboard, and disconnect the connecting cables – in this case it was a thick cable display cable and two thinner Wi-Fi antennae. It should now be possible to separate the display unit from the body of the machine.
Next remove the bezel
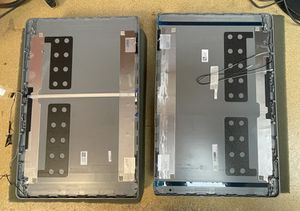
On this Lenovo, it’s easy to spot that the plastic mount points for the brass bushes have been badly damaged. A repair using glue or epoxy would be challenging because there is very little left of the original plastic to give rigidity or aid with placement. For a long-term repair, we need spares.
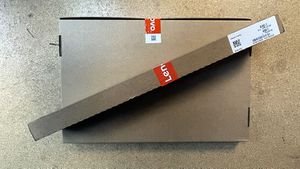
Today we’re lucky. Lenovo is selling the part which we need for a reasonable price.
- Part number: 5CB1M48453 (LCD Cover C 82VG Grey New)
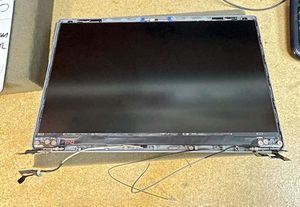
When the screen has been removed, only three items are left. The left Wi-Fi antenna, the right Wi-Fi antenna and the webcam connected to the LCD connection cable.
The replacement lid for this particular Lenovo is semi-furnished. Both Wi-Fi cables are already in situ as are two adhesive strips to replace the screen. The only thing which needs to be removed is the webcam connected to the LCD connection cable.
Using the hairdryer, gently warm the cable and the camera to soften the adhesive and gently peel the cable and webcam from the broken lid.
Note: Laptop webcams are very ‘snappable’. Gentle leverage with a spudger/guitar pick will work nicely.
Once the webcam and cable are out, quickly fit them into the new lid – the adhesive should still be tacky enough to be functional.
Replacing the Screen
Reconnect the 40/30/20 Pin connector on the rear of the screen and if necessary, secure with a little Kapton tape.
As this Lenovo already has adhesive strips, we remove the plastic covering and carefully lower the screen into the correct position.
Top Tip: Not all replacement screens come with adhesives, but they’re available to buy in packs. Don’t be tempted to use double-sided tape as this repair may need to be repeated in the future. Don’t be tempted to push down on the screen to help it bond to the tape. Take a cloth/tea towel and gently rub up and down the screen where the adhesive sits, applying the same pressure as it you were cleaning the screen. This spreads the pressure and you’re less likely to put your thumb through the screen.
Replacing the screws
The owner of this Lenovo had retained all the hinge screws for the laptop, so refitting the hinges was very simple.
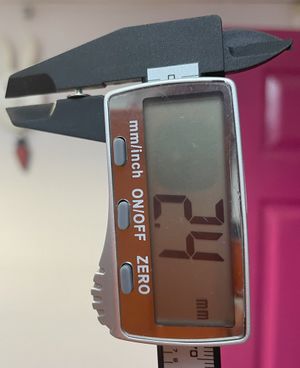
If you’re missing a few hinge screws (they’re often still embedded in the hinges), it is important to use suitable replacements. If you’re unsure of the exact dimensions, then taking measurements with a digital calliper is helpful. Fitting a screw with 4mm length instead of 2.5mm could damage the replacement lid.
If you’re attempting a repair without a reference hinge screw, then start with the smallest you have and get progressively larger. These types of screw are often referred to as Broad Head or Flat Head and many online retailers sell replacements and multi-packs.
Finishing the repair
Replace the bezel (ensuring not to trap the trailing cables) then reseat the body of the laptop. Screw back the hinges, reconnect the battery and replace the bottom cover.
Hinge Maintenance
This really cannot be an article about hinges without mentioning them. Even in modern laptops, the fundamental articulation mechanism of the hinge is unchanged from those used several decades ago.
Hinges can stiffen and slacken. The basis of the hinge is a spring compression mechanism where the tension can be modified by adjusting the retaining nut. Use an adjustable spanner or nut shifter to alter the tension. If the hinge has been damaged with a liquid and is really stiff, a little silicone lubricant should get things moving again.
