How to change watch batteries: Difference between revisions
Boyd-Goldie (talk | contribs) |
No edit summary Tags: Reverted Visual edit |
||
| Line 1: | Line 1: | ||
''This page is work-in-progress. Please come back later - or help to complete it.'' | ''This page is work-in-progress. Please come back later - or help to complete it.'' | ||
==Summary== | ==Summary== | ||
| Line 47: | Line 46: | ||
[[File:Watch back showing notch for winder and O ring.jpg|thumb|187x187px|Watch back showing O ring and also the notch for winder.]] | [[File:Watch back showing notch for winder and O ring.jpg|thumb|187x187px|Watch back showing O ring and also the notch for winder.]] | ||
Twist and the back should pop off. | Twist and the back should pop off. Examine the back. Look at the O ring and check it is undamaged. Identify the notch on the back for the winder. You will need to orientate the back so that the notch is over the winder when you re-assemble the watch. | ||
[[ | See our [[Help-WikiMarkup|Mediawiki Help]] page for a simple guide to formating and markup. | ||
[[File:GingerCat.jpg|180px|thumb|A cat.|left]] | |||
This is an example of how to include pictures. Each should have a suitable description. Alternating them left and right can help keep them aligned with the related text. Click Upload File in the footer of every page in order to upload your own. | |||
N.B. All pictures must include appropriate licencing information. For ones you create yourself for the Wiki, please licence them under Own Work, Creative Commons Attribution-Share Alike 4.0 (CC-BY-SA-4.0). | |||
Wherever possible, technical terms such as [[Glossary:Electricity|electricity]] should be linked to the Glossary definition (as demonstrated) rather than being defined in the text. | |||
===Subsection=== | |||
Organise the information using subsections to make it easy to navigate. | |||
====Sub-subsection==== | |||
A 3rd level of subsection may be useful. | |||
==External links== | |||
* External links (if any) as bullet points. | |||
* If none, delete this section. | |||
[[Category:General]] | [[Category:General]] | ||
Revision as of 19:32, 28 October 2022
This page is work-in-progress. Please come back later - or help to complete it.
Summary
Most watch batteries are easy to replace. This guide is for watches with a snap fit back and not a screw-on back. A snap fit back is the commonest type.
Safe
- To do this task you need a watch press otherwise you will either be unable to replace the back, or you might break the glass
- Do dispose of the old battery properly. Keep batteries out of the way of children as they can be fatal if swallowed.
Main section
Equipment
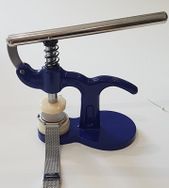
For a snap fit back you need a watch press. They are not expensive and can be bought on eBay or Amazon.
Watch maker's screwdriver. You need a flat ended screw driver with a fine end to prise off the back
Battery. Ideally you should use the internet to find out the battery that fits your watch. There are many different types of watch battery
and they can be bought at a good hardware store, or Amazon or eBay. Of course if you cannot find out that battery that is required, you can open the watch and see the battery that is in place.
A bright light or a head torch
If you use reading glasses, you will need to use them. Magnifying glasses are helpful
Isopropyl alcohol and tissues
Removing the back
Clean the back of the watch with isopropyl alcohol giving particular attention to the join between the back and the body of the watch.
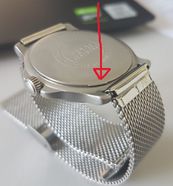
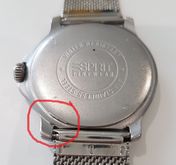
Examine the edge of the back piece to find the small raised area where you will insert your screwdriver.Make a note or take a photograph of the back. Note the position of the winder when the writing is the right way up.
Carefully insert the screwdriver into the gap in the lift off area.
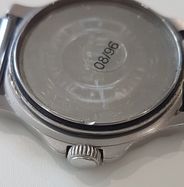
Twist and the back should pop off. Examine the back. Look at the O ring and check it is undamaged. Identify the notch on the back for the winder. You will need to orientate the back so that the notch is over the winder when you re-assemble the watch.
See our Mediawiki Help page for a simple guide to formating and markup.
This is an example of how to include pictures. Each should have a suitable description. Alternating them left and right can help keep them aligned with the related text. Click Upload File in the footer of every page in order to upload your own.
N.B. All pictures must include appropriate licencing information. For ones you create yourself for the Wiki, please licence them under Own Work, Creative Commons Attribution-Share Alike 4.0 (CC-BY-SA-4.0).
Wherever possible, technical terms such as electricity should be linked to the Glossary definition (as demonstrated) rather than being defined in the text.
Subsection
Organise the information using subsections to make it easy to navigate.
Sub-subsection
A 3rd level of subsection may be useful.
External links
- External links (if any) as bullet points.
- If none, delete this section.


